5A’s of Information Literacy

You may feel overwhelmed and ask yourself the following questions…
- Where do I start?
- What is this assignment actually asking me to do?
- What do I already know about this topic?
- Where am I going to get the information I need?
- How do I know what is ‘good’ information?
- Which are the best websites for this assignment?
- How can I make this the best assignment ever?

Ask some questions

Mindmaps can be used to brainstorm ideas for your project and/or record information as you do your research. It is a bit like drawing a map of how your brain is thinking about a topic. You can use colours, pictures, shapes...anything you like to help you organise information. Lines help you to connect information that goes together. You can draw these maps on paper or you can use some really cool Web 2.0 tools and iPad Apps to create your maps. Mindmaps are also a great revision tool when you are studying for tests and exams.

![]()

To be a great Information acquirer you need to understand Boolean Searching
What is Boolean Search?
Boolean searches allow you to combine words and phrases using the words AND, OR, NOT and NEAR (otherwise known as Boolean operators) to limit, widen, or define your search. Most Internet search engines and Web directories default to these Boolean search parameters anyway, but a good Web searcher should know how to use basic Boolean operators.Where does the term Boolean originate? George Boole, an English mathematician in the 19th century, developed “Boolean Logic” in order to combine certain concepts and exclude certain concepts when searching databases.
How do I do a Boolean Search?
The most common strategy is to use the standard Boolean operators AND, OR, NOT, NEAR and WILDCARD
- The Boolean search operator AND is equal to the “+” symbol.
- The Boolean search operator NOT is equal to the “-” symbol.
- The Boolean search operator OR is the default setting of any search engine; meaning, all search engines will return all the words you type in, automatically.
- The Boolean search operator NEAR is equal to putting a search query in quotes, i.e., “sponge bob squarepants”. You’re essentially telling the search engine that you want all of these words, in this specific order, or this specific phrase
- The wildcard option * will find similar words with different ending eg. adolescen* will find adolescent and adolesence
Searching with Google
If you are a regular user of Google then it makes sense for you to learn how to use the powerful tools Google has that will make your search more effective.
The following resources can help you learn how to maximise your use of a Google Search which will, in turn, save you time.
- Basic Search Help
- Improve Your Search Experience
- Google Guide
- Ten tips for smarter more efficient searching
Sources of Information

Referencing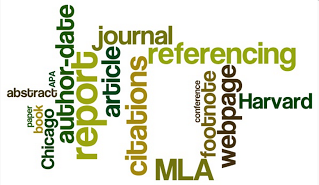
Do you know how to reference the resources you use in a research project?
When you do any kind of research you will be getting information from a lot of different places. As well as Internet sites you may use, books, magazines, videos, interviews, newspapers etc. It is very important to record the places that you get your information in a bibliography or reference list. In fact you should start making your reference list at the start of your project and record every source of information you use.
Even if you only get a couple of ideas and don’t quote anything you still need to acknowledge the source of information.
There are a number of different styles of referencing. Most educational institutions have a particular one that they use as their standard. Check your diary for the format requested. For HSC major works check the BOSTES guidelines.
Try some of these reference guides and generators
| Online Reference Generators
Tailored to Oakhill College Referencing Policy Other generators Cite this for me Another Harvard Referencing Generator |

Academic Writing
CollegeStudentMatt 2011, How to Outline an Essay YouTube 6mins
Cage, Ken How to write a report Youtube 30mins – Information report, research reports and case studies
McMasterSWC 2011, The Good, the Bad and the Useless study tips YouTube 4 mins
BrainFreeze 2013, Mind Mapping: How to Create a Mind Map YouTube 2 1/2 min.
Academic integrity and avoiding plagiarism Youtube 4 mins
Effective reading tutorial Youtube 3:48min
Brochures
What is a brochure?
- A brochure (or pamphlet) is a leaflet, usually made from a single piece of paper.
- Brochures are advertising pieces mainly used to introduce a company or organisation, and inform about products or services to a target audience.
- Brochures are distributed by mail, handed personally or placed in brochure racks. They are usually present near tourist attractions and hotels.
- The most common types of single-sheet brochures are the bi-fold and the tri-fold format.
- http://en.wikipedia.org/wiki/Brochure
RESOURCES
How to make brochures
30 Excellent Brochure Designing Tutorials Plus Tips
How to Make a Brochure with Free Online Tools
My Brochure Maker
Cartoon Makers
Cartoonizer allows its users to create funny cartoon versions of their cats in seconds.Automatoon is a great web application. It allows its users to easily create animations. These animations can be reused anywhere on the web.
Cartoonatic is a great mobile app. It allows its users to turn their videos into cartoons using different cartoonish effects. Anmish is a fun web application. It allows its users to create funny animations using caricatures of political figures.
Host-d.oddcast is a great image editing tool. It allows its users to embed their pictures and cartoonize them into a 3D avatar.
Convert to Cartoon is a great website to use to make cartoons.
Toonlet is another cartoon strip generator tool.
Strip Generator lets you create your own comic strips easily.
Write Comics is a good Web 2.0 tool for creating comics.
Make Belief Comics tool allows users to create stories out of comic strips and share them with others The process is very easy to use and above all student friendly.
Pixton is a tool that lets users create stories out of cartoons and provided characters.
Storyboard Generator lets you choose a script and create a storyboard. Try building your own storyboard using background location photographs.Once done, you can save and share your storyboard video with friends.
Digital Storytelling
Digital Storytelling is the modern expression of the ancient art of storytelling. Digital stories derive their power by weaving images, music, narrative and voice together, thereby giving deep dimension and vivid color to characters, situations, experiences, and insights. Tell your story now digitally.
– Leslie Rule, Digital Storytelling Association
Digital Storytelling Tools
Here are a list of useful storytelling Web 2.0 Tools
The Elements of Digital Storytelling
Describes the key elements of a digital story.
Digital storytelling: A tutorial in 10 easy steps
A step-by-step guide to creating a digital story
Digital storytelling from soup to nuts
This is a very comprehensive guide with examples of digital stories scattered throughout.
Primary Access
A suite of free online tools that allows students and teachers to use primary source documents to complete meaningful and compelling learning activities with digital movies, storyboards, rebus stories and other online tools.
Animoto
Allows you to create multimedia slideshows.
Essay Writing
One of the most important skills that you need to develop while at school is to be able to translate your ideas into an essay format. Many students struggle with the techniques of essay writing and tend to avoid it BUT the skills you struggle with are the ones you need to practice the most.
The resources provided here will help you master the technique of essay writing.
| Guide to writing a basic essay This is an easy to follow guide for essay writing.Persuasive Essay Thesis Builder Fill in the fields and press the button and your essay outline is produced. Basic guide to essay writing Provides simple steps to guide you through the writing processWriter’s Models Provides an extensive range of writing models including essays, letters, brochures, documentaries, book reviews and much more. Each explanation is a Flash presentation.Lightning Bug Lightning Bug is a website designed to support young adult writers and includes a useful range of resources and links.Thesis Builder An online essay builder that helps students to develop a persuasive essay.Resources for the essay writer From choosing a topic to organising a paper, writing an essay can be tricky. In addition, you have to check for spelling errors, make sure you haven’t plagiarised, and cite any sources you may have used. Here you will find resources to help you every step of the way, from choosing a topic to checking your paper for plagiarism and errors.Essay writing An excellent resource that provides support not only for essay writing but writing across all learning areas – worth a look. OWL (The Purdue Online Writing Lab) If you are struggling in any way with your academic writing them you will find some great resources to help you here. This writing lab has been developed by Purdue University.8 Steps to writing a great paperPP Essay WritingEXTRA RESOURCES The most miss-spelled words In Australia! Grammar Tips Paragraph Writing Essay Command Words Writing Thesis Statements |
Podcasts
|
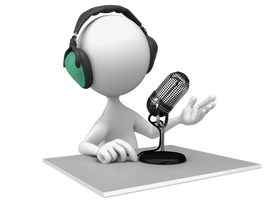
WHAT IS A PODCAST?
A podcast is an audio file recorded on a computer and later shared on the Internet. Podcasts come in three formats: Audio – they use narration, music and sound effects Screen – a digital recording from a computer screen output (also known as video screen capture or sceencast) Video – contains video, narration and music (also known as vidcast or vodcast) |
|
There are many podcasting tools that you can use today to create your own podcasts. Some are ‘platform specific’ (like Garageband) and some are web-based which allows them to be used on any computer that has a web browser.PODCAST TOOLS
There are many tools and programs that you can use to creat a podcast. Here are perhaps the best two programs to make a simple podcast or you can use one of the many Apps available for you phone, iPad or android device which allow you to record your vice
|
|
|
 |

Posters
Getting started on your poster
Most viewers will spend less than 5 minutes looking at your poster. Before you begin, therefore, ask yourself the question……
If a person is only going to remember one idea about my poster, what do I want that idea to be?
Posters tell a story.
A research poster explains to the viewer what you did, why you did it and what you learned from your research. If you are trying to persuade someone to think in a certain way then the text and images will try and evoke a certain attitude about a topic.
Make a plan, storyboard or mind map that will help you organise your information. Draw a rough sketch first and then modify it as you get clearer about what you want o put on your poster.
Choosing your tools
Posters can be created using traditional things like cardboard, magazine clippings and coloured pens and textas OR you can explore some of the great online tools that are now available.
(Check out the tools listed below).
Mastering the basics
A good poster looks simple and uncluttered. Someone standing one metre away should quickly be able to see and understand each component of your poster.
Elements of a good poster:
Have a title. Poster titles created on a computer guarantee that the lettering is professional and easy to read.
Illustrations and photographs should be clear and properly proportioned. Don’t forget NOT to break any copyright rules when you are sourcing your pictures. Try and use Creative Commons images or better still create your own.
Connect your words to your graphic elements.
Viewers can’t read small type from a distance. Use 24pt type or larger.
If hand-making your poster make sure all of your background materials and graphics have straight edges and even margins; use a ruler and scissors to cut out components such as charts, graphics, photos and text before pasting them on (unless you are trying to create a ‘torn-edge’ or burnt effect).
Be concise. Use minimal text. Try bullet points or a photograph to convey information. The saying ‘A picture paints a thousand words‘ is very apt when creating a poster.
Creating design unity
Use white space, type and colour to create unity in the poster:
White space is any area not covered by a design element such as a picture, a word, or even a letter. White space guides the eye and makes the other components stand out. Too much and the viewer’s eye will wander. Too little and the result is confusion.
Serif fonts (top) are easy to read quickly. Sans serif fonts (bottom) are easy to read at a
distance.
Style of type, or font
Limit yourself to three or fewer font types. A font can be either “serif” like Times New Roman or “san serif” like Helvetica and Ariel. In general, fonts like Times Roman are better for the text while Helvetica and Ariel are good for titles and to label figures.
Colour
Think about your colour choices. Individual colours have visual weight. There should be a contrast between text and background. Be aware of the connotations that certain colours and colour combinations carry. Black and orange for example can carry the connotation of Halloween. Try and keep the background colour solid rather than patterned.
Final Tips
1) Sketch out your ideas early.
2) Print out your photos, illustrations and other materials.
3) Print out a ‘proof’ and get someone to check for spelling errors, typos etc.
Some softwaretools for creating posters.
Microsoft Word Publisher / Powerpoint
Pages (Apple) (try the templates)
Online Poster Tools
There are many new interactive poster tools online now to help you create dynamic posters. Here are just a few. We will continue to add more as we discover them.
Glogster
Lets you design great posters that have multimedia elements.
Poster Maker
Make a professional looking poster to present your work.
PosterMyWall
Cool looking posters. Poster My Wall.
Avatar
There are many programs that can help you to create great avatars. Here are some of them.
GoAnimate
You can make animated videos with avatars you design yourself.
Voki
Create speaking avatars with this great tool.
Build your wild self
Create a wild animal that represents you.
Doppelme
With DoppelMe you can create a cool graphical likeness of yourself, your friends, family or any group of people for use as an avatar in forums, instant messenger, blogs and almost anywhere else on the web. This is a great way to have a web presence but be anonymous at the same time.
eBooks
There are a number of tools available to help you create you own digital books (also known as eBooks or electronic books). Digital books can be read on your computer, iPad or other digital device depending on what program or web tool was used to create it.
Below are some examples or what can be used to create eBooks
|
|
iBook Author
Available free on the Mac App Store, iBooks Author allows anyone to create iBooks for iPad. With galleries, video, interactive diagrams, 3D objects, and more Books created I’m iBook Autor can also be viewed in OBooks on an iPad that has Mavericks installed. |

|
|
Book Creator
The simple way to create your own beautiful iBooks, right on the iPad. Read them in iBooks, send them to your friends, or submit them to the iBooks Store. Ideal for children’s picture books, photo books, art books, cook books, manuals, textbooks, and the list goes on. |

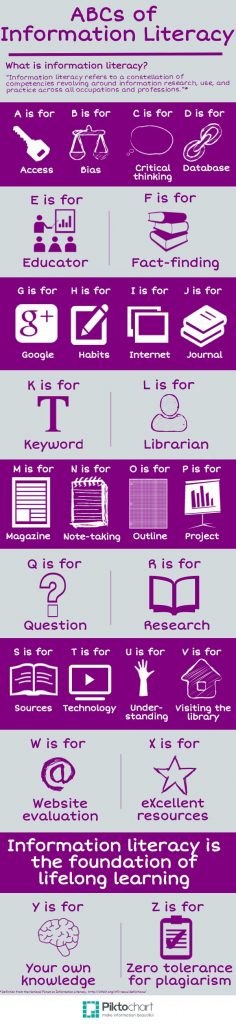
Infographics
Infographics is a new word that you will find being used a lot on the web at the moment. So what are they?
Well, information graphics or infographics are visual representations of information, data or knowledge. These graphics are used where complex or large amounts of information need to be explained quickly and clearly. It is like an online version of the poster you might find at school. For a more detailed explanation, take a look at the definition as defined by Wikipedia.
Infographics can help you create dynamic assignments by adding pictorial representations of complex information. For spatial (or visual) learners this is a great way to represent and learn information.
Visual.ly
Visual.ly is a new online application which allows you to create detailed data visualisations and infographics. You can browse the Showcase of over 3,500 of the best infographics on the Web.
Easel.ly
A tool for creating infographics from scratch or by using some great templates.
10 Awesome Free Tools to Make Infographics
This website is worth a look. It has an extensive list of online resources to help you create your own infographics.
20+ Tools to Create Your Own Infographics
Here is an extensive list of Infographics tools
Kathy Shrock’s Infographic Topics
An extensive list of examples to get you started.
Cool Infographics
Gives great advice on the technical aspects like colour selection, layout etc.
Infographic Designs: Overview, examples and best practices
This is an excellent introduction to Infographics. Answers the What? Why? and How?
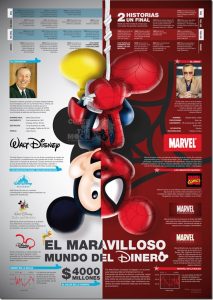
10 Great Infographics
Here are some excellent examples of data being presented as an information graphic.
Multimedia Presentations
During your school career there will be times that you have to give a presentation, whether it is in front of a small group, the class or the whole school.
The presentation format you use will greatly depend on the purpose and audience for your tasks. More and more, with the advent of new technologies, we can merge mediums (mashups etc) to creatively present our work and share with a world-wide audience. Listed below are a range of presentation and digital storytelling tools that you may consider using for your final product.
10 tips for making beautiful slideshow presentations
Websites
Creating a website is a great way to not only showcase your learning but also to organise and have immediate access to a range of resources related to your topic.
Websites also allow you to embed a range of Web 2.0 tools to make your work dynamic and interesting.
Five of the easiest (and free) web design tools are:
Google sites

There are many more website builders but these provide a great place to start.
IMPORTANT
It is very important when you are creating a website that you keep your personal details private. Check with your teachers and parents about what is appropriate for this website in terms of the identifying information you will use.
It is also important to ensure you use appropriate language and themes. If you need further information about this check out the Cybersmart website
If you have created a great website and would like us to showcase it please send us the link and we will put it in the Gallery.
Evaluating your assessment

Assessment Rubric
Reflection Journal
PMI
KWL Chart
KWL stands for
- What I Know
- What I want to know (or learn)
- Why I learned (found out)
You can use this reflection tool throughout the research process to help you show how your understanding about the topic you are studying has changed. It helps to make your learning ‘visible’.
Information fluency in action at Oakhill
|
Staff PD activity – Work through each stage of the Oakhill College 5A’s of Information Literacy website and collaboratively plan and design with Library teaching staff an assessment and/or lesson sequence to use with your classes.
Rationale: The Information and technology general capability is a feature of all NSW syllabus documents. Here, students have the opportunity to become competent, discriminating and creative users of ICT as they learn to use ICT effectively and appropriately when investigating, creating and communicating ideas and information. Students will learn about the ethics of information communication through technology.
The 5A’s Information Literacy is a whole school approach to this capability that is aligned to the Oakhill Learning Framework. Information Literacy develops a lifelong skill that enables deep surface learning where students are reflective and self regulating. Learning is owned by the learner where they are co-creators of knowledge.
 Information fluency and NSW syllabus documents Overview of outcomes for subjects 7-10
Professional reading
Information Literacy Models
|
Guided Inquiry
Guided inquiry is an approach or methodology which allows students to seek and engage with a variety of ideas to increase their understanding in pursuit of knowledge and greater awareness. Guided inquiry is a planned, supervised and targeted intervention into developing information literacy and enhancing learning. This approach or methodology to learning provides a means by which teachers are able to tailor learning experiences and opportunities, resources and processes to the needs and abilities of each student according to intended curriculum learning outcomes.
ALIA/ASLA policy on guided inquiry and the curriculum.
https://www.alia.org.au/about-alia/policies-standards-and-guidelines/aliaasla-policy-guided-inquiry-and-curriculum
Guided Inquiry Resource Links
Guided Inquiry (Great Lakes Science)
ASLA. Inquiry into guided inquiry
Carol Collier Kuhlthau. Information search process
Information age inquiry. Information search process (ISP)
The information search process
Kuhlthau’s Information search process (ISP)
Research Articles
The following research articles provide background information about guided inquiry and may be useful in your own planning.
Guided Inquiry: School Libraries in the 21st Century
Carol Collier Kuhlthau School of Communication and Information, Rutgers The State University of New Jersey, USA
The twin purposes of Guided Inquiry: guiding student inquiry and evidence based practice
Lee Fitzgerald Scan Vol 30 No 1 February 2011